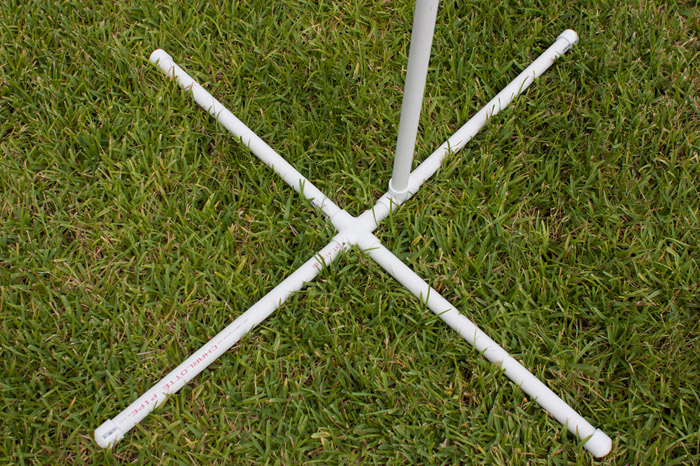
I started researching how to make a structure similar to a clothesline that I could use to hold my quilts up for photos. I figured PVC pipe would be the easiest option, so I did some searches for PVC pipe photography backdrops, which are similar enough. I found this tutorial via Pinterest, and used it as a guide to make my own quilt backdrop.

I used 3/4" schedule 40 PVC pipe, as Jeff recommends in his post. I also followed his instructions for the two leg bases.
My backdrop measures roughly 74" wide and 76" tall. I have a crossbar for support at 48" height, and it can also be used for photographing smaller baby quilts. I can also add 2, 12" extensions to the width to accommodate a queen size quilt, although it will extend onto the ground a bit.
My original plan was to make a backdrop that would have a second add-on unit that would extend the height and width to about 96", but when I was assembling it, it became clear that it would be WAY too tall, and might not even stand. I ended up nixing the height addition, but keeping the optional width extension.
The structure completely disassembles with little effort, thanks to the slip-on pipe fittings.
To make your own quilt backdrop, you will need:
- (4) 10' x 3/4" Sch. 40 PVC pipes ($2.54 each @ Lowe's)
- (6) 3/4" Sch. 40 slip-on T connectors ($.42 each)
- (2) 3/4" Sch. 40 slip-on cross connectors ($1.79 each)
- (10) 3/4" Sch. 40 slip-on caps ($.39 each)
You'll also need a PVC pipe cutter or some other cutting tool.
For the first two pipes, cut each into a 72" and 48" section. Cut a third pipe into (6) 18" pieces and (2) 2" pieces. Cut the last pipe into (2) 12" pieces, (2) 18" pieces, and (2) 27" pieces.
Stick one cap on the end of each 18" and 12" piece.
Attach (3) 18" pieces to one of the cross connectors. Join a 2" piece and an 18" piece with a T connector and attach the 2" side to the last opening on the cross connector. This is your backdrop base. Repeat to make the second base.
Stick a 48" piece of pipe into each of the open holes on your bases. Stick a T connector on top of each so the T is sideways.
Place a 72" piece between the two legs of your backdrop and fit it into the T connectors.
Attach the 27" pieces to the top of each backdrop leg. Top each one with a T connector so that the T is oriented normally. Place another 72" piece between each leg and fit into the T connectors.
Attach the 12" pieces to the open ends of the top T connectors for additional with if desired.
With the help of some simple clamps from the hardware store, you're ready to hang your quilt!


No comments :
Post a Comment